
Calibration of the darkness reading of Lunatico devices
Calibrating the darkness reading of our devices is actually a pretty straight-forward process. We will first give a bit of background on the matter, but feel free to skip to the calibration instructions if you would rather just cut to the chase.
There are many factors conspiring to make this a controversial matter:
—The stars’ magnitudes are measured using specialised filters. There is no such thing as a star’s magnitude, but rather a “Johnson-V magnitude”, for example, being Johnson-V one such photometry filter.
—We can have the most precisely calibrated device, but then after a few days under real, outdoor conditions, the covering window can be dirty or fogged up. Or, after a long period of time, worn out.
—Popular devices use a filter that approaches the human eye sensitivity more, with an IR and R cut similar to those of the daylight cameras.
As explained elsewhere, we decided to use a modern dichroic UV/IR filter with a bandpass similar to the ones commonly used in astroimaging—so it could be argued our devices’ results will be slightly different to those of other existing devices.
We also decided to perform a basic calibration at the factory, and leave the user the option to fine-tune it if required.
Remember—if you are interested in accurate results, other than the calibration you should inspect the device from time to time, especially in dusty environments.
Calibrating the devices
Now, let’s get down to the actual process of calibration. Calibrating the sky quality readings of your Lunático devices can be achieved quite easily using a software like ASTAP—which you probably already know, but in case you don’t, is a free FITS viewer with photometry and astrometry features.
We will list the steps using ASTAP, but the same results can be achieved using an analogous procedure elsewhere.
- Install ASTAP (ASTAP download – SourceForge).
- Download the v50 star database (v50 star database download – SourceForge).
- Take a picture of the area of the sky you are most interested in. Take note of the SQM value provided by the CloudWatcher at the same time as taking the image. We would suggest the zenith, but you can opt to take a few images at different altitudes and average them. There are some conditions, however, that the image has to fulfil in order to be eligible for the SQM report:
- Image is astrometrical solved for star flux-calibration against the star database magnitudes.
- The background value is larger than pedestal value or mean dark value. If not expose longer.
- Apply on single unprocessed raw images only.
- Providing dark image(s) in tab darks (ctrl+A) or entering a pedestal value (mean value of a dark) increases the accuracy. If possible provide also a flat(s) in tab flats.
- DSLR/OSC raw images require 2×2 binning. For DSLR images this is done automatically.
- Most of the image is free of deepsky nebula.
- The calculated altitude is correct. The altitude will be used for an atmospheric extinction correction of the star light.
- No filter is used except a UV/IR block filter.
- Calibrate the image [Ctrl+U]
- Generate the SQM report [Ctrl+Q]. It should look something like Figure 1.
- Compare the SQM reading provided by ASTAP, and how it differs from the one the CloudWatcher read. Set the darkness reference value accordingly.
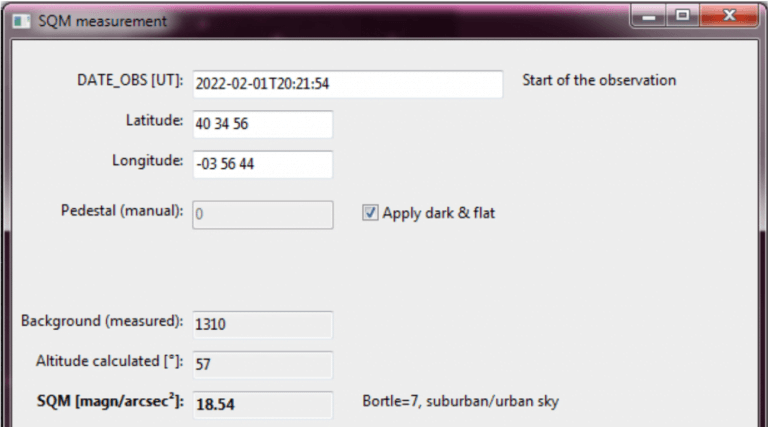
Figure 1
And voilà, you’re all set. If you’re curious about the new light sensor itself, you may be interested in this article: New light sensor for the CloudWatcher (LUNATICOASTRO.COM).